
This article presents a design for a simple application with microservices architecture. To build this project, 4 important tools have been used, they are Docker, Flask-RestPlus, RabbitMQ, and Nameko. The design will show us the advantages and disadvantages of microservices architecture.
Getting Started
Microservices is a variant of the service-oriented architecture (SOA) architectural style that structures an application as a collection of loosely coupled services. In a microservices architecture, services should be fine-grained and the protocols should be lightweight. The benefit of decomposing an application into different smaller services is that it improves modularity and makes the application easier to understand, develop and test. It also parallelizes development by enabling small autonomous teams to develop, deploy and scale their respective services independently.It also allows the architecture of an individual service to emerge through continuous refactoring. Microservices-based architectures enable continuous delivery and deployment.
In this article, we use following tools:
Flask-RestPlus: aims to make building REST APIs quick and easy. It provides just enough syntactic sugar to make your code readable and easy to maintain. The killer feature of RESTPlus is its ability to automatically generate an interactive documentation for your API using Swagger UI.
Docker is a software technology providing containers, promoted by the company Docker, Inc. Docker provides an additional layer of abstraction and automation of operating-system-level virtualization on Windows and Linux. Docker uses the resource isolation features of the Linux kernel such as cgroups and kernel namespaces, and a union-capable file system such as OverlayFS and others to allow independent “containers” to run within a single Linux instance, avoiding the overhead of starting and maintaining virtual machines (VMs).
RabbitMQ is an open source message broker software (sometimes called message-oriented middleware) that originally implemented the Advanced Message Queuing Protocol (AMQP) and has since been extended with a plug-in architecture to support Streaming Text Oriented Messaging Protocol (STOMP), MQTT, and other protocols [1]. The RabbitMQ server is written in the Erlang programming language and is built on the Open Telecom Platform framework for clustering and failover. Client libraries to interface with the broker are available for all major programming languages.
Nameko is a framework for building microservices in Python.
You should have the basic understanding some basic commands of Docker before getting start.
The aims of this project are to setup a simple microservices application and to compare with tradition monolithic architecture.
Application Structure Overview
In this project, you’re going to build a booking movie application that help user save the information of movie and the showtime of it. The application consists of several components including the swagger UI, with implements the user interface, along with some backend services checking user input, saving database.
If the application is deployed as a simple monolithic application, it will consist a single docker web container and a database container. This solution has a number of benefits:
- Simple to develop
- Simple to deploy. Code is in a single container.
- Simple to scale horizontally by running multiple copies behind a load balancer.
With this architecture, project will be developed fast but after a long time, project become larger, there are some problem with it:
- This simple architecture has a limitation in size and complexity.
- Application is too large and complex to fully understand and made changes fast and correctly.
- Contiuous deployment is hard.
- Changes will impact all application which leads to do extensive manual testing.
- Adopting new technology is difficult. Changes in framework will affect an entire application it is extremely expensive in both time and cost.
Because of below reasons, you will adopt Microservices architecture in this project. The idea is to split your application into a set of smaller, interconnected services instead of building a single monolithic application. Each microservice is a small application that has its own hexagonal architecture consisting of business logic along with various adapters. Some microservices would expose a REST, RPC or message-based API and most services consume APIs provided by other services.
Our application will divide into several container. The following deploy diagram show the architecture of application:

We can see some benefits of Microservices architecture:
- Each microservice is deployed independently. It makes continuous deployment possible for complex application.
- Each microservice can be scaled independently.
- Adopting new technology is easy now. The changes in a microservice is not affect entire application.
- Much easier to understand and maintain.
- Enable each service to be developed independently by a team that is focused on that service.
Also, we can realize some drawbacks of this architecture:
- It adds a complexity to the project by the fact that a microservices application is a distributed system. You need to choose and implement an inter-process communication mechanism. In this case we need to add a message broker to transfer RPC message between microservices.
- It has the partitioned database architecture. The update database has relationships with each others is much harder than before.
- Deploying a microservices-based application is also more complex.
With small application like this project, Monolithic architecture is better choice. Microservices architecture pattern is the better choice for complex, evolving application. In order to study and compare this architecture, you’re going to program this project using Microservices approach.
Setup container communication
The first step for setting up project environment is creating a docker network. It allows containers communicate within it. Bridge networks offer the easiest solution to create your own Docker network. Open Terminal and type following command:
1 | $ docker network create -d bridge test-network |
This command creates a bridge network named test-network
Setup RabbitMQ
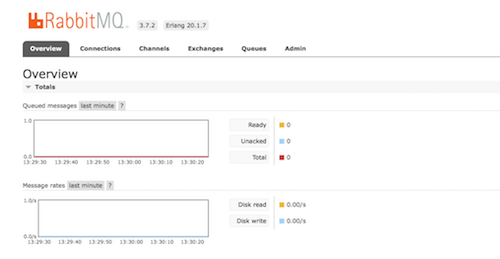
RabbitMQ is a message-queueing software called a message broker or queue manager. In this project, it use for transfer RPC message between containers. The easiest way to have a RabbitMQ in development environment is running its official docker container, considering you have Docker installed run:
1 | docker run -d --hostname rabbit-broker --name rabbit-broker -p 80:15672 --net test-network rabbitmq:3-management |
Go to the brower and access http://localhost:31 using credentials guest:guest if you can login to RabbitMQ dashboard it means you have it running locally for development.
Setup MySQL database
In order to deploy MySQL database in local, you’re going to start a new docker container for the MySQL server with this command:
1 | $ docker run --name base-mysql --net test-network -e MYSQL_ROOT_PASSWORD=quan -d mysql |
This command create new container from mysql image named base-mysql and run on test-network. Also, you’ve set the default password for root is quan. Now, access to the container by typing following command:
1 | $ docker exec -it base-mysql bash |
You should see some introductory information followed by a # prompt. Next, connect to mysql server by typing this following command and use password quan:
1 | # mysql -u root -p quan |
The mysql> prompt tells you that mysql is ready for you to enter SQL statements. Create new database named demoDb by typing this command:
1 | mysql> CREATE DATABASE demodb; |
Now, you’ve created the database will be used for this project. You can disconnect to sql server and move on next part by typing quit (or \q) at the mysql> promp:
1 | mysql> quit |
Also, disconnect to the sql container by typing following command:
1 | # exit |
Setup User Module
In this section, you’re going to create a docker container for user data management. For getting start, create a new forder named UserModule and change to this directory by typing following command:
1 | $ mkdir UserModule |
Requirement File
Requirements file states the software required to be installed in the container. Create a file requirements.txt inside UserModule folder
1 | nameko |
Dockerfile
This file is needs to create a docker image and deploy it
1 | FROM python:3-onbuild |
Build the docker image
Run the following command to build the docker image user-module from UserModule directory
1 | $ docker build -t user-module . |
Run the Docker Container
Run the following command to run user-module container in test-network :
1 | $ docker run -d -it --name user-module -v $(pwd):/code --net test-network -e MYSQL_SERVER=base-mysql -e MYSQL_DATABASE=demodb -e MYSQL_USERNAME=root -e MYSQL_PASSWORD=quan user-module |
With this command, you’ve create new docker container named user-module , -v $(pwd):/code means copy all current forder’s content to code forder of container and you’ve embed the information of database server in environment variable with -e MYSQL_SERVER=base-mysql -e MYSQL_DATABASE=demodb -e MYSQL_USERNAME=root -e MYSQL_PASSWORD=quan. Now you’ve finished the init environment setup for user module.
Declare User Database
Using your text editor create an new file named database.py in the userModule forder and add following contents to this file:
1 | from sqlalchemy import Table, Column, Integer, String, MetaData, ForeignKey, create_engine |
- Declare metadata variable
- Declare users variable. It represents your users table in database.
- Get the mysql database server’s information from environment variables.
- Build database server URI.
- Declare engine by running sqlalchemy command create_engine.
Next, you need to connect to user-module command line cli. Type following in your terminal:
1 | $ docker exec -it user-module bash |
Then, enter the python prompt to run python code by enter this command:
1 | # python |
Finally, type following commands to create the databse using sqlalchemy framework:
1 | >>> from database import engine, metadata |
Declare database schema
At this point, you’ve create the user table and be able to query the database. The query result is sqlalchemy object so you need to serialize to a JSON-encoded string by using marshmallow library. Open text editor, create a new file named serializer.py and add following content to this file:
1 | from marshmallow import Schema, fields |
The service code
Now, you have the RabbitMQ and MySQL container work normally. Let’s code the nameko RPC services. In this article, the service only does some basic CRUD operation to keep it small and simple. Open text editor, create new file named service.py and add following content:
1 | from nameko.rpc import rpc, RpcProxy |
Run the services
Connect to the user-module container’s command line cli by typing this command:
1 | $ docker exec -it user-module bash |
Run nameko userModule service by typing following in user-module ‘s command line cli:
1 | # nameko run service --broker amqp://guest:guest@rabbit-broker |
Setup Movie module
This module uses for movie data management. Similar to user module, you create a new forder for this section by typing following command:
1 | $ cd .. |
Build the docker image
We use the same library with the user module so copy the Dockerfile and requirements.txt from userModule forder to movieModule forder. Then, run the following to build the movie container:
1 | $ docker build -t user-module . |
Run the Docker Container
Run the following command to start the container:
1 | $ docker run -d -it --name movie-module -v $(pwd):/code --net test-network -e MYSQL_SERVER=base-mysql -e MYSQL_DATABASE=demodb -e MYSQL_USERNAME=root -e MYSQL_PASSWORD=quan movie-module |
Declare Movie Database
Creat new file database.py in movieModule add following content:
1 | from sqlalchemy import Table, Column, Integer, String, MetaData, ForeignKey, create_engine, Float |
You create movie database the same method creating user database. Type following command:
1 | $ docker exec -it movie-module bash |
Enter python prompt and create the movie table:
1 | # python |
Declare database schema
Create serializer.py file of this module and add following content:
1 | from marshmallow import Schema, fields |
The service code
Final step of this section is creating service.py file and add following content:
1 | from nameko.rpc import rpc, RpcProxy |
Run the services
Connect to the movie-module container’s command line cli by typing this command:
1 | $ docker exec -it movie-module bash |
Run nameko movieModule service by typing following in movie-module ‘s command line cli:
1 | # nameko run service --broker amqp://guest:guest@rabbit-broker |
Setup Booking Module
The final data management module in this project is booking module. Like 2 below module, you create a new forder for this section by typing following command:
1 | $ cd .. |
Build the docker image
We use the same library with 2 below so copy the Dockerfile and requirements.txt from userModule forder to bookingsModule forder. Then, run the following to build the movie container:
1 | $ docker build -t booking-module . |
Run the Docker Container
Run the following command to start the container:
1 | $ docker run -d -it --name booking-module -v $(pwd):/code --net test-network -e MYSQL_SERVER=base-mysql -e MYSQL_DATABASE=demodb -e MYSQL_USERNAME=root -e MYSQL_PASSWORD=quan booking-module |
Declare Bookings Database
Creat new file database.py in bookingsModule add following content:
1 | from sqlalchemy import Table, Column, Integer, String, MetaData, ForeignKey, create_engine, ARRAY,DateTime,func |
You create movie database the same method creating user database. Type following command:
1 | $ docker exec -it booking-module bash |
Enter python prompt and create the movie table:
1 | # python |
Declare database schema
Create serializer.py file of this module and add following content:
1 | from marshmallow import Schema, fields |
The service code
Final step of this section is creating service.py file and add following content:
1 | from nameko.rpc import rpc, RpcProxy |
Run the services
Connect to the booking-module container’s command line cli by typing this command:
1 | $ docker exec -it booking-module bash |
Run nameko bookingsModule service by typing following in booking-module ‘s command line cli:
1 | # nameko run service --broker amqp://guest:guest@rabbit-broker |
Setup Flask RESTPlus module
This module provide web Swagger UI to interact with 3 inner modules. For getting start, create a new forder named flaskModule and change to this directory by typing following command:
1 | $ cd .. |
Requirement File
Create a file requirements.txt inside flaskModule folder with following content:
1 | Flask |
Dockerfile
Create Dockerfile in current directory and add following content:
1 | FROM python:3-onbuild |
Defining your Flask app
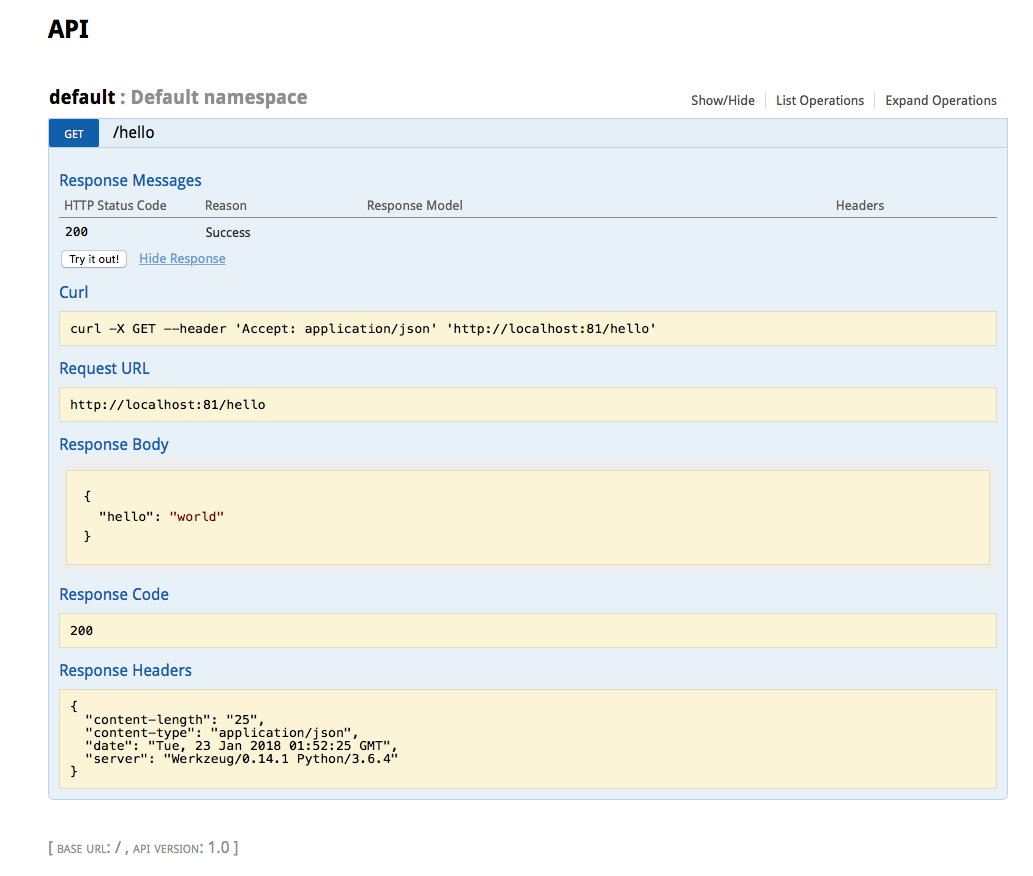
Flask and Flask-RESTPlus make it very easy to get started. For getting started, create app.py file add 10 lines of hello world working api:
1 | from flask import Flask |
Build the docker image
Run the following command to build the docker image flask-module from flaskModule directory
1 | $ docker build -t flask-module . |
Run the Docker Container
Run the following command to run flask-module container in test-network :
1 | $ docker run -d -it --name flask-view -v $(pwd):/code --net test-network -p 30:5000 -e BROKER_NAME=rabbit-broker -e BROKER_USERNAME=guest -e BROKER_PASSWORD=guest flask-module |
Now everything should be ready. In your brower, open the URL http://localhost:30/. You should see Swagger UI similar to the following:
Defining API namespaces and RESTful resources
In this project, the API is splited into 3 separate namespaces. Each namespace has it own URL prefix and is stored in a separate file in /services directory. Run following command to create this forder:
1 | $ mkdir services |
RestPlus resources are used to organize the API into endpoints corresponding to different types of data used by your application. Each endpoint is called using a different HTTP method. Each method issues a different command to the API. For example, GET is used to fetch a resource from the API, PUT is used to update its information, DELETE to delete it.
We start by creating user namespace, we create a collection, a resource and associated HTTP methods.
- GET /user/ - Retrieve a list of user
- POST /user/ - Create new user
- GET /user/1 - Retrieve information of user with ID 1
- PUT /user/1 - Update information of user with ID 1
- DELETE /user/1 - Delete user with ID 1
- GET /user/1/Bookings/ - Retrieve with ID 1 ‘s information of bookings
Create a python file user.py inside services directory. Using Flask RESTful you can define an API for all of the endpoints listed above with following block of code :
1 | from flask import request |
The api.namespace() function creates a new namespace with a URL prefix. The description field will be used in the Swagger UI to describe this set of methods.
The @ns.route() decorator is used to specify which URLs will be associated with a given resource. You can specify path parameters using angle brackets, such as in @ns.route(‘/
Each resource is a class which contains functions which will be mapped to HTTP methods. The following functions are mapped: get, post, put, delete, patch, options and head.
The @api.expect() decorator allows you to specify the expected input fields. The detail for it will be present in next section.
Similar, you create the movies.py for movie namespace with following code:
1 | from flask import request |
Finally, create bookings.py for bookings namespace:
1 | from flask import request |
Define API parameters
In order to define these parameters, we use an object called the RequestParser. The parser has a function named add_argument(), which allows us to specify what the parameter is named and what its allowed values are. From flaskModule directory, create a new python file named serializers.py and add following code:
1 | from flask_restplus import fields, reqparse |
- type keyword specify the argument’s type. Allowed values are int, str, bool.
- location keyword specify arguments to be present in the query of your method in the header or request body.
- action keywork and append value create an argument which accepts multiple values.
Read more about RequestParser in the Flask-RestPlus docs.
Like mention in previous section, once the model is defined you can attach it to a method using the @api.expect() decorator:
1 |
|
Add namespaces to application
It’s time to add namespaces has been created in previous section to application by replacing following code into app.py file:
1 | from flask import Flask, Blueprint |
Take a look into the app.py file and the initialize_app function.
This function does a number of things, but in particular it sets up a Flask blueprint, which will host the API under the /api URL prefix. This allows you to separate the API part of your application from other parts. Your app’s frontend could be hosted in the same Flask application but under a different blueprint (perhaps with the / URL prefix).
In order to add these namespaces to the API, we need to use the api.add_namespace() function.
In your brower, open the URL http://localhost:30/api/. You should see Swagger UI similar to the following:

Conclusions
In this article, a simple application with microservices architecture has been constructed. In this process, we have learned how to use Docker, Nameko, Flask RestPlus, RabbitMQ to build project step by step. Finally, we can see the advantages and disadvantages of microservices architecture compare with tradition monolithic architecture.
This is the final source of this project.
Also, I created the IOS application using API was developed in this project.
To build and run this system is require typing a lot of commands so I created a yaml file docker-compose.yml. Then, you just need to run :
$ docker-compose up
all microservice containers will be start automatically.